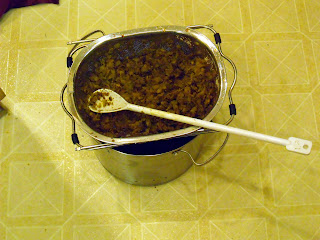
All ingredients were purchased through Northern Brewer, and can be found on their website.
Ingredients:
- 6 lbs Muntons Dark Malt Extract (dry)
- 1/2 lb Simpson's Extra Dark Crystal Malt (160 °L, crushed)
- 1/2 lb Simpson's Chocolate Malt (375-450 °L, crushed)
- 1/4 lb Simpson's Black Malt (500-600 °L, crushed)
- 1 oz Chinook hops (11.4% alpha-acid, pellet)
- 1 oz Galena hops (12.8% alpha-acid, pellet)
- 2 oz Cascade hops (4.5-7% alpha-acid, whole leaf)
- White Labs Burton Ale Yeast
- 5 gal Arrowhead Spring Water
- 1 tsp Irish Moss
- 1 tsp Gypsum
I brewed the day I received my ingredients. The White Labs yeast is live, and shipped in liquid; if it's warmed for prolonged periods of time, it can die. I felt a little trepidation when I saw the yeast was shipped without a cold pack of any kind, and I immediately decanted it into a boiled, cooled solution of about 1:4 sucrose:water.
Tap water in Santa Barbara is pretty hard, and has an unpleasant aftertaste. I started this batch with 2.5 gal of bottled water in a kettle. I added the crushed specialty grains (Dark Crystal, Chocolate, and Black Malts) to a nylon bag and steeped it in the water as I brought it up to 170 °F (about 45 min). At this point, I turned the heat off and let the grains sit for 20 minutes -- a poor man's mash. With no other insulation besides the lid of the kettle, temperature dropped about 5 °F over the 20 min mash.
After steeping, I removed the grain bag and added the dry malt extract, stirring to dissolve. I brought the wort to a boil (approx. 30 min), and added the Chinook and Galena hops pellets. These hops were chosen for their high alpha acid content -- since they are subjected to the full 60 min boil, most of their aroma and flavor will be stripped away, leaving just the bitterness the alpha acids provide.
Thirty minutes into the boil, I added the Irish Moss and Gypsum. Irish Moss, actually the seaweed Chondrus crispus, acts as a coagulant to clarify the beer by bringing proteins out of colloidal dispersion. Gypsum, basically Calcium sulfate, serves to add a specific amount of minerality or hardness to the water to accentuate the hops profile. I haven't tested beer without these additions, since their effects should be minor, and since I've been satisfied with the results I've obtained.
At this point, I sanitized everything with which the finished wort would come in contact: primary fermenter and its lid, airlock, and metal strainer. This was done by mixing food grade Iodophor with enough water to make an amber-colored solution, putting the strainer and airlock in the fermenter, swishing the Iodophor around for a few minutes, and then letting everything air dry.
Finally, it was hop time. I divided the Cascade hops into 4 equal parts, and added them with 15, 10, 5, and 0 minutes left in the boil. While I haven't had a bad experience with pellet hops, I deliberately chose the whole-leaf variety to make sure the essential oils hadn't been damaged or lost during processing.
After finishing the hour boil, the goal is to cool the wort to pitchable yeast temperature (80-90 °F) as quickly as possible. This is needed for two reasons: first, to minimize the chance of bacterial contamination of the unfermented wort, and two, to increase the amount of protein coagulation as the wort cools. I accomplished this by placing the entire kettle in a cooler filled with ice and salt water. It took about 45 minutes to drop to 100 °F, at which point I strained the wort into the primary fermenter, and added another 3 gal of room-temperature bottled water to bring the total volume to 5 gal at a temperature low enough to pitch the yeast into the fermenter. I swirled vigorously for about 1 min to aerate the wort (intially the yeast reproduces aerobically), then put the lid and airlock in place.
Finally, I stored the beer in a closet (dark, stable temperature). Fermentation started about 20 hrs later, and the most vigorous bubbling and krausen formation occurred in the subsequent 48 hrs. The next step is racking to a secondary fermenter, so stay tuned...


Brown man you need to get a cooling coil it is really nice. I have a hose attachment I can put on my sink so I can do it inside when the weather is bad.
ReplyDeleteAgreed, it's on my wishlist. By how much does it cut your cooling time?
ReplyDeleteNormally my cooling time is under 10min with the coil it does depend on the weather a bit and how insulated your pipes are. When it has been hot for awhile it can take closer to 15 min.
ReplyDelete